Choosing a layout that prioritizes gear placement and workspace zones can save you hours each week. Position your monitors at ear level and create an efficient workflow with easy access to your most-used equipment. Incorporate acoustic treatments and soundproofing to reduce setup time and improve sound quality automatically. Keep cables organized and designate specific zones for recording, mixing, and editing. This smart setup minimizes clutter and streamlines your process, and there’s more to uncover for even greater efficiency.
Key Takeaways
- Position monitors at ear level in an equilateral triangle for accurate sound and easier mixing.
- Design dedicated zones for recording, mixing, and editing to streamline workflow and reduce setup time.
- Implement cable organization to quickly identify and access equipment, minimizing troubleshooting delays.
- Use acoustic treatment strategically to prevent sound reflections, reducing adjustments during sessions.
- Place frequently used gear within arm’s reach to enhance efficiency and focus during creative tasks.
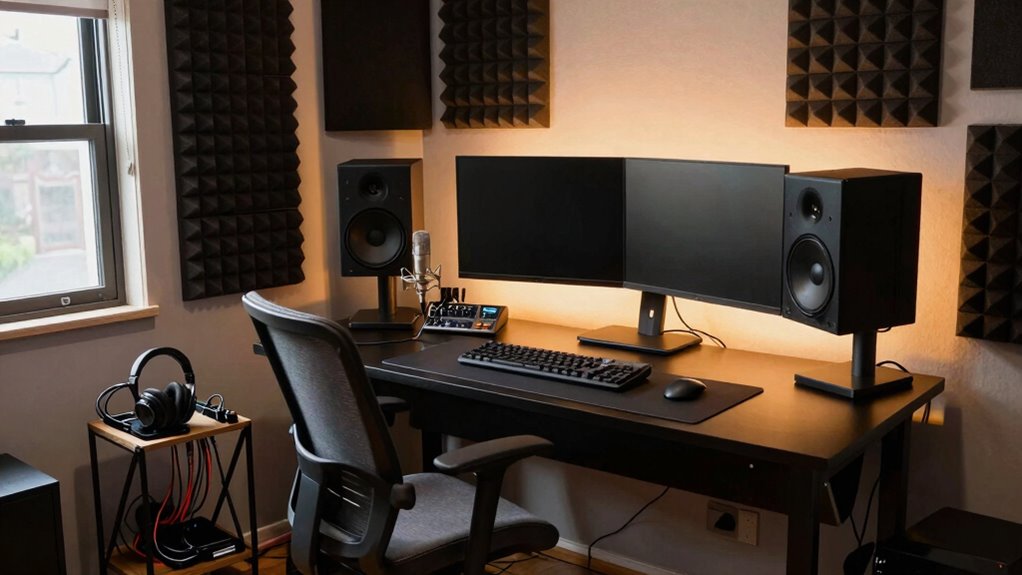
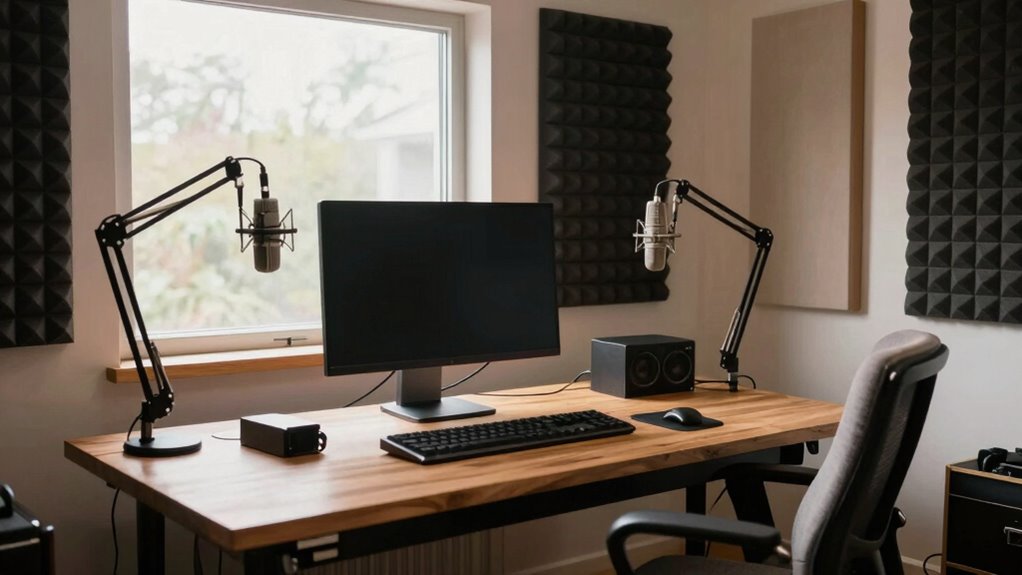
Choosing the right layout for your home studio is an essential step that can greatly influence your workflow and sound quality. When you plan your space carefully, you set yourself up for efficiency and better results. One of the first things to consider is acoustic treatment. Proper placement of acoustic panels and bass traps helps control sound reflections, reducing unwanted echo and ensuring your recordings and mixes are accurate. You don’t want your sound to bounce unpredictably around the room, so take the time to position acoustic treatment thoughtfully. This not only improves your listening environment but also minimizes the need for constant adjustments later, saving you hours of troubleshooting. Additionally, incorporating soundproofing techniques can further enhance your acoustic environment by preventing external noise from interfering with your recordings. An effective layout also considers room dimensions, ensuring that the space supports your specific audio needs without causing acoustic issues. Understanding room acoustics is crucial for optimizing your studio setup and achieving professional-quality sound. To maximize your setup, it’s also helpful to familiarize yourself with acoustic principles, which can guide your decisions on placement and treatment for optimal sound quality. Paying attention to sound reflection and how it interacts with your space can make a significant difference in your overall sound clarity.
Cable management is another crucial aspect often overlooked during initial planning. When your cables are tangled and cluttered, it becomes a hassle to find what you need quickly, and it increases the risk of accidental disconnections or damage. Invest in cable organizers, clips, and sleeves to keep everything tidy and accessible. By routing your cables neatly along walls and furniture, you not only create a safer workspace but also speed up setup and teardown, helping you stay focused on your projects instead of fighting with clutter. Well-managed cables also prevent interference that can degrade your sound quality, so it’s worth paying attention to this detail from the start.
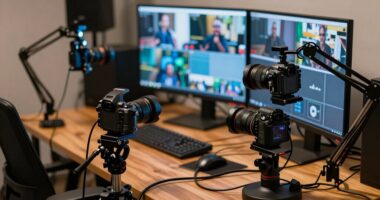
Your layout should prioritize easy access to all your gear, so think about how you move around your space. Position your monitor speakers at ear level and form an equilateral triangle with your listening position to get the clearest sound. Keep frequently used equipment within arm’s reach to minimize unnecessary movement. This arrangement reduces fatigue and streamlines your workflow, allowing you to jump into recording, editing, or mixing without wasting time adjusting or searching for equipment.
Additionally, consider how you’ll use your space for different tasks—recording, editing, mixing, or even relaxing. Clear zones help you switch between activities seamlessly. For example, designate a dedicated recording corner with soundproofing and acoustic treatment, and keep your mixing desk in an area with optimal sound reflection control. When every element of your layout supports your workflow, you spend less time reorganizing and more time creating.
In the end, a well-thought-out home studio layout that emphasizes acoustic treatment and cable management saves you hours every week. It creates a smooth, efficient environment where your gear is accessible, your sound is clear, and your focus stays on your music rather than on fixing problems or untangling cables. When you start with a solid plan, you’ll notice the difference in your productivity and the quality of your work.

Vondynote Pair of Studio Monitor Stands Adjustable Height 32.6"-50.9" Heavy Duty Three Point Triangle Base Floor Speaker Stands Monitor Stands
- Top Plate Size: 9×9 inch for broad speaker support
- Vibration Dampening: 2mm foam pad reduces vibrations
- Non-slip Surface: Prevents speaker shifting and protects cabinet
As an affiliate, we earn on qualifying purchases.
As an affiliate, we earn on qualifying purchases.
Frequently Asked Questions
How Do I Customize My Studio Layout for Different Projects?
To customize your studio layout for different projects, start by adjusting equipment placement to suit each task. Incorporate acoustic treatment specific to your needs, like bass traps or diffusers, to optimize sound quality. Move monitors, microphones, or desks as necessary, ensuring a comfortable workflow. You might also add portable acoustic panels for temporary setups. Regularly reassess and tweak your layout, so it remains efficient and tailored to each project’s requirements.
What Budget Options Are Available for Building a Home Studio?
You can build an affordable home studio using budget-friendly options like affordable soundproofing materials, such as foam panels or weatherstripping, and portable studio solutions like compact audio interfaces and foldable desks. These options save you money while maintaining quality. Look for second-hand gear or DIY materials to further reduce costs. With smart choices, you can create a functional studio without breaking the bank, saving both time and money.
How Can I Improve Soundproofing in My Current Setup?
Think of your studio as a fortress, where soundproofing is your shield. To improve sound isolation, add acoustic treatments like bass traps and foam panels to absorb reflections. Seal gaps around doors and windows with weatherstripping or door sweeps. These simple steps considerably reduce noise leakage, creating a better environment. Remember, soundproofing isn’t just about blocking sound; it’s about crafting a space where your creativity can thrive undisturbed.
What Essential Equipment Should I Prioritize in a Small Space?
You should prioritize acoustic treatment and ergonomic furniture in your small space. Acoustic panels and bass traps help control sound reflections, improving your mix accuracy. Ergonomic furniture guarantees comfort during long sessions, boosting productivity. Focus on a sturdy desk for your gear and a comfortable chair. By combining effective acoustic treatment with ergonomic setup, you’ll create a functional, comfortable studio that saves you hours and enhances your workflow every week.
How Do I Manage Cable Organization Effectively?
Oh, managing cables perfectly? It’s a breeze, right? Just ignore cable routing and hope for the best—just kidding! To stay organized, use clear cable labels and route your cables neatly along designated paths. Keep excess cables coiled and secured with Velcro straps. This simple approach prevents tangles, saves time, and keeps your workspace tidy, so you can focus on creating rather than untangling.

50 Pack Acoustic Foam Panels,2"X 12" X 12"Sound Proof Foam PanelsHigh Density Sound Absorbing Panels,Soundproof Wedges Panels for Studio Recording & Office & Home
- Professional Sound Absorption: Reduces noise, echoes, and background sounds
- Easy Installation: Lightweight panels with adhesive options
- Eco-Friendly Material: Non-toxic, formaldehyde-free polyurethane foam
As an affiliate, we earn on qualifying purchases.
As an affiliate, we earn on qualifying purchases.
Conclusion
Choosing the right home studio layout is like planting a seed for productivity; it grows more valuable each week. When you optimize your space, you cut down on wasted time and frustration, turning your studio into a well-oiled machine. With every tweak, you’ll find yourself sailing smoothly through projects, as if your studio is a trusty compass guiding you to success. Invest in the right layout, and watch your efficiency blossom beyond your expectations.

MATEIN Cord Organizer Case with Adjustable Divider, Large DJ Cable File Bag
- Double Layered Organization: Keeps accessories well organized with multiple pockets
- Large Capacity Storage: Ample space with removable shock-absorbing partitions
- Stylish and Durable Design: Features shiny textured material and sturdy leather handle
As an affiliate, we earn on qualifying purchases.
As an affiliate, we earn on qualifying purchases.

Focusound 52 Pack Acoustic Foam Panels 1" x 12" x 12" Sound Proof Foam Panles Soundproofing Noise Cancelling Wedge Panels for Home Office Recoding Studio with 300PCS Double-Side Adhesive
- Soundproofing Design: Triangular grooves for noise absorption
- Includes Adhesive Tape: 300pcs double-sided adhesive for easy installation
- Easy Shape Recovery: Reforms after soaking in water
As an affiliate, we earn on qualifying purchases.
As an affiliate, we earn on qualifying purchases.