To make budget footage look premium, focus on simple lighting techniques like using adjustable LED lights, diffusers, and reflectors to soften shadows and create even illumination. Place your key light at a 45-degree angle and slightly above eye level for a flattering, cinematic look. Keep color temperature consistent across all lights for a natural feel. Mastering these easy, affordable setups can elevate your videos quickly—stay tuned to discover even more tips for professional results.
Key Takeaways
- Use adjustable LED lights with consistent color temperature to ensure natural, high-quality footage.
- Incorporate diffusion materials like white sheets or shower curtains to soften shadows and reduce glare.
- Position key lights at 45-degrees and slightly above eye level for flattering, cinematic illumination.
- Employ reflectors to bounce light and fill shadows evenly without additional cost.
- Match color temperature across all lights to create a cohesive, premium appearance.
How Lighting Makes Your Budget Videos Look Professional

Good lighting can instantly elevate the look of your budget videos, making them appear more polished and professional. One key factor is adjusting the color temperature, which influences whether your footage looks warm or cool. Using lights with adjustable settings helps you match the light to your environment, creating a natural look. Light diffusion also plays an essential role by softening harsh shadows and reducing glare, giving your shots a smooth, professional feel. Even inexpensive lights with basic diffusion materials can make a big difference. When you pay attention to these elements, your footage gains a consistent, high-quality appearance. Properly managing color temperature and light diffusion guarantees your videos look intentional, well-crafted, and visually appealing—no expensive equipment required. Additionally, understanding survival gear essentials can help you stay prepared for unexpected situations during outdoor shoots, ensuring safety and resourcefulness. Recognizing how lighting techniques affect the overall image can further enhance your video quality without breaking the bank, especially when you learn to optimize lighting setup for different environments. Incorporating lighting principles into your process can help you achieve a more professional look even with limited resources.
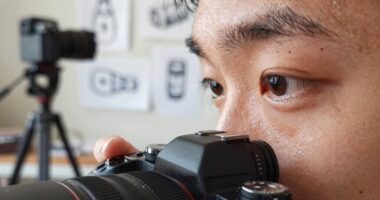
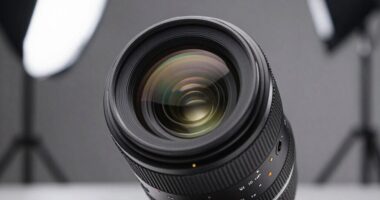
Choosing Budget-Friendly Lighting Equipment for Great Results

Even with a limited budget, you can find effective lighting tools that deliver professional-looking results. Focus on equipment that allows you to control color temperature, ensuring your footage looks natural and consistent. Look for affordable LED panels or work lights with adjustable settings, so you can fine-tune the warmth or coolness of your light. Light diffusion is essential; use inexpensive diffusers or white sheets to soften harsh shadows and create a more flattering look. When selecting gear, consider:
- Adjustable LED lights for flexible color temperature control
- Diffusers or softboxes to spread light evenly
- Budget-friendly reflectors to bounce light and fill shadows
- Compact, portable lights suitable for tight spaces
These choices will help you achieve a cinematic quality without breaking the bank, especially if you incorporate lighting placement techniques that maximize your equipment’s effectiveness. Additionally, understanding how ergonomics can impact your setup can ensure comfort during long shooting sessions, ultimately enhancing your overall production quality. Paying attention to lighting angles can also improve the aesthetic and clarity of your footage. Incorporating knowledge of data storage and backup solutions can help you securely save your footage, ensuring your hard work isn’t lost due to equipment failure.
Essential Lighting Techniques for a Cinematic Look
Once you’ve set up your budget-friendly lighting equipment, mastering key techniques can elevate your footage to a cinematic level. Controlling color temperature is vital; aim for warm tones for intimacy or cooler shades for a dramatic effect. Use gels or adjustable LED lights to fine-tune this aspect. Light diffusion also plays a fundamental role—diffusing harsh light softens shadows and reduces glare, creating a more polished look. You can achieve this with inexpensive diffusion materials like white plastic or shower curtains. Incorporating lighting options that suit different environments can further enhance your setup. Additionally, understanding the different lighting styles used in various genres can help you tailor your approach for specific moods. Recognizing early warning signs in your lighting setup can prevent common issues and ensure consistent results. Being aware of lighting techniques used by professionals allows you to replicate their cinematic effects on a budget. Practicing these techniques and incorporating visual cues can help you craft a cinematic atmosphere, even with basic gear. Combining proper color temperature with effective diffusion helps you craft a cinematic atmosphere, even with basic gear. Practice balancing these elements to add depth and mood to your scenes, making your footage look more professional and visually engaging.
How to Position Your Lights for a Polished, High-Quality Video

Positioning your lights correctly is vital for achieving a polished, professional look in your videos. Proper placement enhances your subject’s features and creates a balanced, cinematic feel. Start by placing your key light at a 45-degree angle to your subject, slightly above eye level, to avoid unflattering shadows. Adjust your fill light to soften shadows, keeping it close enough to fill in without overpowering. Use light diffusion to spread light evenly, preventing harsh spots. Consider color temperature to match ambient lighting for a natural look, ensuring consistency across your footage.
- Position your key light at a 45-degree angle and slightly above eye level
- Use fill lights to soften shadows without flattening the image
- Incorporate light diffusion for even, gentle illumination
- Match color temperature for a cohesive, natural tone
Troubleshooting Common Lighting Problems in Your Videos

Lighting issues can quickly undermine the quality of your footage, even if your setup was initially correct. One common problem is inconsistent color temperature, which creates unnatural color casts. To troubleshoot, check your light sources and verify they match in Kelvin. Mixing different color temperatures results in jarring visuals. Another issue is harsh shadows or overly soft shadows, affecting the scene’s depth. Adjust shadow softness by changing light distance or diffusing the light source. If shadows are too harsh, add diffusion or bounce light to soften them. Conversely, if shadows are too soft, move the light closer or reduce diffusion. Regularly review your footage and tweak these elements to achieve a balanced, professional look. Properly managing color temperature and shadow softness makes your footage look polished, even with budget gear. Additionally, understanding your consumer tech settings can help optimize lighting performance and consistency. Being aware of lighting principles can also guide you in creating more visually appealing videos. For example, color calibration tools can assist in maintaining consistent lighting conditions. Exploring lighting setup options in various environments can help you discover what works best for your specific environment and style.
Frequently Asked Questions
How Does Color Temperature Affect the Perceived Quality of Your Footage?
Color temperature markedly influences your footage’s perceived quality by affecting color contrast and overall mood. Warmer temperatures create a cozy, inviting feel, while cooler tones evoke a modern, sleek look. Adjusting color grading helps you refine these effects, guaranteeing your footage looks professional. Properly managing color temperature ensures your visuals communicate the right mood, making your content appear more polished and high-quality, regardless of your initial setup.
Can Natural Light Be Used Effectively to Enhance Budget Video Quality?
Sure, natural illumination and outdoor lighting can make your budget videos look surprisingly professional. It’s ironic, but the best shots often come from simply using the sun’s natural light, avoiding costly equipment. With proper timing—like golden hour—you can achieve warm, flattering tones. Just watch out for harsh shadows or overexposure. When used thoughtfully, outdoor lighting transforms ordinary footage into something that looks both natural and high-quality.
What Are the Best DIY Solutions for Professional-Looking Lighting on a Budget?
For DIY lighting and budget solutions, you can start with practical items like LED desk lamps or clamp lights with adjustable bulbs. Diffuse harsh light with white bedsheets or parchment paper to soften shadows. Use inexpensive reflectors like white foam boards or aluminum foil on cardboard to bounce light. Position your lights strategically, aiming for a three-point setup, to create a professional look without spending much.
How Do Shadows Influence the Cinematic Feel of Your Videos?
Shadows are like silent storytellers, shaping your video’s mood. They influence the cinematic feel by adding shadow depth and contrast control, which guides your audience’s emotions. Well-placed shadows create mystery or intimacy, while harsh shadows might evoke tension. By controlling shadows, you craft visual depth and drama, transforming simple footage into a compelling narrative. Think of shadows as your secret tools for elevating production quality effortlessly.
What Post-Production Techniques Can Enhance Your Lighting Setup?
You can enhance your lighting setup through post-production by adjusting lighting contrasts to add depth and drama. Use color grading to refine the mood, emphasizing warm tones for intimacy or cool tones for a sleek look. Boost highlights and deepen shadows selectively to create a more dynamic visual. These techniques help make your footage look more professional, even if your initial lighting wasn’t perfect.
Conclusion
Remember, good lighting can transform your budget videos into professional-looking content. Studies show that viewers are 80% more likely to watch a video with proper lighting, highlighting its importance. By choosing affordable equipment and mastering key techniques, you can achieve a cinematic look without breaking the bank. Keep experimenting with positioning and troubleshooting, and you’ll consistently produce polished videos that captivate your audience. Quality lighting truly makes all the difference in elevating your content.